Are you looking to add some style and aerodynamics to your car? Installing a car front lip spoiler is a great way to achieve that. In this article, we will guide you through the step-by-step process of installing a front lip spoiler on your vehicle. Get ready to gather your tools, prepare your vehicle, and secure that spoiler in place. Let’s get started!
Gather the Necessary Tools and Materials
First, you’ll need to gather the tools and materials necessary for the installation. To successfully install a car front lip spoiler, make sure you have the following items handy: a front lip spoiler kit, a screwdriver set, a drill with various drill bits, measuring tape, masking tape, a pencil, a level, and a rag for cleaning the surface. It’s important to have all these tools readily available before starting the installation process. The front lip spoiler kit typically includes the spoiler itself, mounting brackets, and screws. You may also need additional tools depending on the specific instructions provided in the kit. By gathering all the necessary tools and materials beforehand, you’ll be well-prepared to begin the installation of your car front lip spoiler.
Prepare Your Vehicle for Installation
Before you begin the installation process, gather a clean rag and thoroughly clean the surface of your vehicle where the front lip spoiler will be attached. This step is crucial to ensure a secure and long-lasting installation. Start by wiping away any dirt, dust, or debris that may be present on the surface. Use a mild soap or automotive cleaner to remove any stubborn grime or grease. Pay close attention to the area where the front lip spoiler will be attached, as it needs to be completely clean and free from any contaminants. After cleaning, make sure to dry the surface thoroughly before proceeding with the installation. This will ensure proper adhesion of the front lip spoiler and prevent any issues in the future.
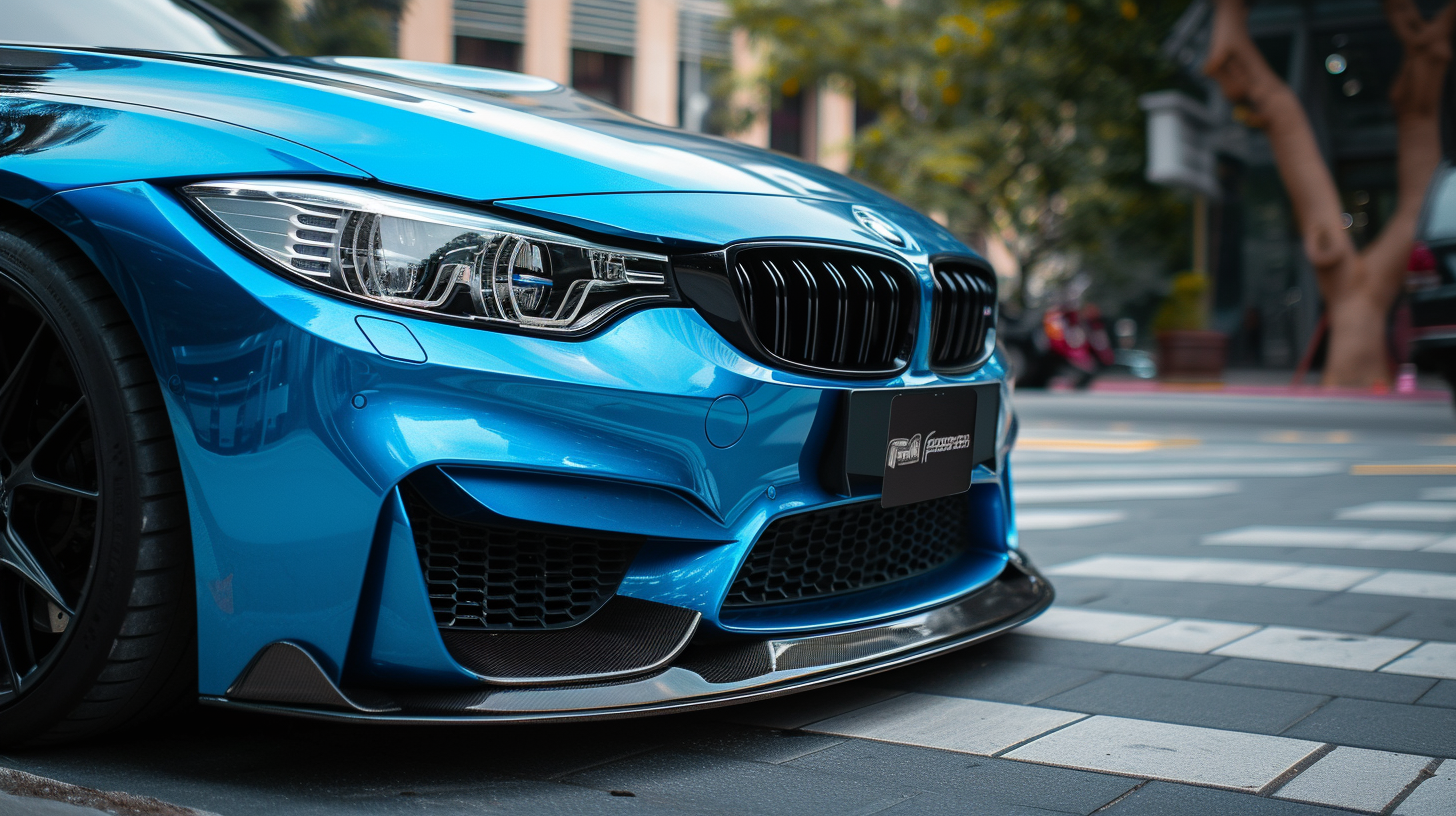
Position and Secure the Front Lip Spoiler
To position and secure the front lip spoiler properly, you need to ensure that it is aligned and fits correctly on your vehicle. Use the appropriate attachment methods and tools to securely fasten the spoiler in place. By following these steps, you can achieve a professional-looking installation that enhances the appearance of your car.
Proper Alignment and Fit
Attach the front lip spoiler securely to the front bumper for a proper alignment and fit. This step is crucial to ensure that the spoiler sits correctly and enhances the overall appearance of your car. Begin by carefully positioning the spoiler on the front bumper, aligning it with the edges and contours of the bumper. Once you have determined the correct placement, use the provided screws or adhesive tape to secure the spoiler in place. Make sure to tighten the screws firmly but not excessively, as overtightening can damage the spoiler or the bumper. If using adhesive tape, apply it evenly along the edges of the spoiler, pressing firmly to ensure a strong bond. Double-check the alignment before proceeding to the next step to guarantee a perfect fit.
Attachment Methods and Tools
Once you have carefully positioned the front lip spoiler, it is important to securely attach it using the appropriate tools and methods. To begin, make sure you have the necessary tools on hand, such as a drill, screws, and brackets. Start by marking the areas where the spoiler will be attached, ensuring they align with the pre-drilled holes in the spoiler. Then, using the drill, create pilot holes at the marked spots. Next, attach the brackets to the underside of the spoiler using the provided screws. Once the brackets are in place, carefully align the spoiler with the front of your car and secure it by tightening the screws into the pilot holes. Finally, double-check the alignment and make any necessary adjustments before tightening all the screws securely.
Attach the Spoiler to the Bumper
Before you can attach the spoiler to the bumper, make sure that all the necessary hardware is included in the installation kit. Check for bolts, screws, brackets, and any other components required for the installation. Once you have confirmed that everything is present, position the spoiler on the bumper according to the manufacturer’s instructions. Align it properly and ensure that it sits flush against the bumper surface. Use the provided screws or bolts to secure the spoiler in place. Start by attaching the center section of the spoiler and then move on to the sides. Tighten the screws or bolts firmly, but be careful not to overtighten and damage the spoiler or bumper. Once the spoiler is securely attached, give it a final check to make sure it is properly aligned and sits evenly on the bumper.
Ensure Proper Alignment and Fitment
Make sure the front lip spoiler is aligned correctly and fits snugly onto the bumper. Proper alignment and fitment are crucial for a clean and professional installation. Start by placing the front lip spoiler onto the bumper and ensuring that it lines up with the edges and contours. Take a step back and visually inspect the alignment from different angles. If adjustments are needed, carefully move the spoiler until it sits perfectly flush with the bumper. Once the alignment is satisfactory, check the fitment by pressing down on the spoiler. It should feel secure and not wobble or move. If there is any looseness, you may need to add additional mounting hardware or make further adjustments to achieve a tight fit. Taking the time to ensure proper alignment and fitment will not only enhance the appearance of your car but also improve the durability of the front lip spoiler.
Seal and Reinforce the Spoiler for Added Durability
To ensure added durability, you should consider sealing and reinforcing the spoiler with adhesive and mounting brackets. Once you have properly aligned and fitted the front lip spoiler, it’s important to reinforce it to withstand any potential damage or impact. Start by applying a high-strength adhesive along the edges of the spoiler to create a strong bond between the spoiler and the car’s body. Make sure to use an adhesive that is specifically designed for automotive applications. Additionally, you can reinforce the spoiler by installing mounting brackets underneath it. These brackets will provide extra support and stability, preventing the spoiler from sagging or coming loose. Secure the brackets to the underside of the spoiler using screws or bolts, ensuring a tight and secure fit. By sealing and reinforcing your car front lip spoiler, you can enhance its durability and protect it from potential damage.
Test and Fine-tune the Installation
After ensuring the proper alignment and reinforcement of your car front lip spoiler, you can now test and fine-tune the installation to ensure optimal performance. Start by taking your car for a short drive to assess how the spoiler affects its handling and stability. Pay attention to any vibrations, noises, or changes in the car’s behavior. If everything feels and sounds normal, you can proceed to fine-tuning. This involves checking the fit and alignment of the spoiler once again to make sure it is securely in place. You can also make any necessary adjustments to the height or angle of the spoiler to achieve the desired aerodynamic effect. Finally, give your car another test drive to confirm that the installation is successful and that the spoiler enhances the overall performance of your vehicle.

Lucas is an experienced vehicle technician with hands-on knowledge of almost every car brand available. Throughout his career, Lucas has worked on a wide range of vehicles, including domestic and foreign models, sports cars, trucks, and SUVs.


